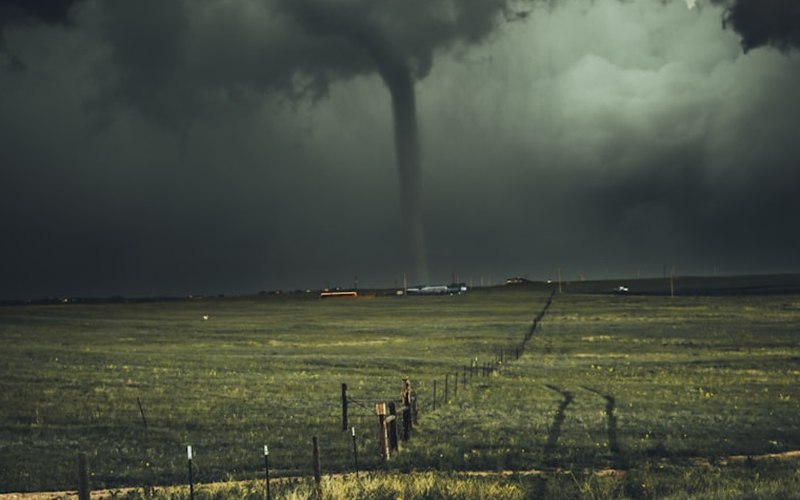
Each year, natural disasters touch millions of households across the country, whether in the form of hurricanes, tornadoes, wildfires, floods, or brutal winter storms. What separates families who bounce back fast from those left struggling for months is, more often than not, how ready they were. Preparedness has nothing to do with living in fear. It's a set of concrete moves that keep your loved ones safe, hold property damage down, and shorten the road back when life takes a sudden turn. This guide walks you through what to handle before, during, and after a disaster.
Emergency Kit Essentials
Every home needs a supply kit it can grab and go with on a moment's notice. FEMA advises being able to fend for yourself for at least 72 hours, though many now suggest a two-week stash given how large recent disasters have grown. Keep the kit in a waterproof container somewhere you can reach in seconds.
Basic Supplies (Per Person)
- Water: A gallon per person each day for three days or more, covering both drinking and sanitation
- Food: A three-day stock of items that won't spoil (canned goods, protein bars, dried fruit, peanut butter, crackers), and don't forget a manual can opener.
- Medications: A week's worth of every prescription at minimum, along with basic pain relievers and antihistamines from the drugstore
- First aid kit: Bandages, antiseptic, gauze, medical tape, tweezers, scissors, and any supplies specific to your family's needs
- Flashlights and batteries: Two flashlights at least, with spare batteries. Skip candles, which pose a fire hazard.
- Battery-powered or hand-crank radio: Your link to emergency broadcasts once power and internet go dark
- Phone chargers: Fully charged portable battery packs plus a charger for the car
- Cash: A minimum of $200 in small bills, since ATMs and card readers go dead during long outages.
- Copies of key documents (covered in the section below)
Additional Items to Consider
- A week or more of food, water, and medication for your pets
- Baby essentials: formula, diapers, wipes, and jarred food
- Warm blankets or sleeping bags
- A fresh change of clothes and solid shoes for everyone in the house
- Trash bags and plastic ties to manage sanitation
- A wrench or pliers for shutting off utilities
- A whistle to call for help
Home Fortification
Toughening up your house against violent weather cuts the damage it takes and shields your family through events you simply can't flee.
Structural Reinforcement
- Roof straps (hurricane clips): These metal connectors lash the roof to the wall framing so high winds can't peel it off. Professional installation runs $500 to $2,500, and plenty of insurers knock money off premiums for homes that have them.
- Storm shutters or impact-resistant windows: They guard against flying debris, the number-one cause of structural failure in a hurricane. Permanent shutters cost $3,000 to $10,000 for a full house, while impact windows cost more but protect you all year and trim energy bills too.
- Garage door reinforcement: The garage door is one of a home's weakest points in a windstorm. A bracing kit ($200 to $500) boosts its resistance considerably.
- Foundation bolting: Where earthquakes are a threat, anchoring the frame to the foundation keeps the house from sliding off when the ground shakes. Figure on $1,500 to $5,000.
Landscape and Exterior
- Tree maintenance: Take down dead or failing trees and cut back limbs that hang over the roof or threaten power lines. Yearly professional trimming runs $200 to $600 per tree.
- Clear defensible space: In wildfire country, keep a 30-foot buffer around the house by clearing dead growth, moving firewood away from the walls, and planting fire-resistant landscaping.
- Drainage improvements: Keep gutters clear and aim downspouts so water lands at least six feet from the foundation, and slope the surrounding soil away from the house so water can't pool.
Important Document Storage
In a disaster's aftermath, you'll want fast access to the papers that drive insurance claims, financial recovery, and proving who you are. Guard them with more than one layer of backup:
- Paper originals tucked into a fireproof, waterproof safe or a bank safety deposit box
- Digital scans kept in encrypted cloud storage (Google Drive, iCloud, or a purpose-built service such as Everplans)
- A USB drive holding those same scans, stashed inside your emergency kit
Documents to Protect
- Your homeowner's policy, complete with the agent's contact details and your policy number
- A home inventory: photos or video of every room and prized item, paired with receipts for the costly purchases
- Mortgage paperwork and the property deed
- Birth certificates, Social Security cards, and passports
- Medical and immunization records
- Vehicle titles and registration
- Bank and investment account details
- Your will, power of attorney, and any other legal documents
Insurance Review Checklist
- Dwelling coverage: Does the figure match what it would actually cost to rebuild today, rather than your home's market value?
- Flood insurance: Ordinary policies leave floods out entirely, so you'll need a separate NFIP or private flood policy.
- Earthquake coverage: Likewise carved out of standard policies, and essential if you live where the ground moves.
- Personal property coverage: Is the cap high enough to replace what you own? Weigh replacement cost against actual cash value.
- Additional living expenses: This pays for somewhere to stay if your home becomes unlivable, so confirm both the dollar limit and how long it lasts.
- Deductibles: Wind and hurricane deductibles often run as a percentage (1% to 5% of dwelling coverage) rather than a fixed sum.
Give your policy a once-over every year, and revisit your coverage after big renovations or major purchases.
Emergency Communication Plan
When disaster hits, cell networks routinely buckle or go silent. A communication plan keeps your family able to find one another even when the usual lines fail:
- Pick an out-of-area contact. Name a friend or relative in another state that everyone can call to check in, since long-distance calls frequently connect when local ones won't.
- Set meeting points. Choose two spots: one close to home (a neighbor's place or a clear landmark) and one beyond the neighborhood (a school, community center, or a relative's house).
- Text rather than call. Texts use far less bandwidth and stand a better chance of slipping through a jammed network.
- Learn your kids' school emergency plans. Find out where students will be moved and how you're meant to collect them when something goes wrong.
- Save ICE (In Case of Emergency) contacts in every family member's phone.
Generator Options
A drawn-out blackout is one of the most familiar fallout from a disaster, and a generator keeps the systems that matter alive:
- Portable generators ($500 to $2,000): Gasoline-powered units that run the must-haves like the fridge, sump pump, and phone chargers. Always run them outdoors because of carbon monoxide, store fuel safely, and cycle it out every six months.
- Inverter generators ($800 to $3,000): Quieter and easier on fuel than the standard portables, and the cleaner power they put out is safe for delicate electronics.
- Standby generators ($3,000 to $15,000 installed): Mounted permanently outside, they run on natural gas or propane, fire up on their own the instant the grid drops, and can carry the whole house. They call for professional installation and yearly servicing.
- Battery backup systems ($5,000 to $15,000): Whole-home batteries such as the Tesla Powerwall bank energy from the grid or your solar panels. They run silent, emit nothing, and need no upkeep, though how long they last depends on how much your household draws.
Evacuation Planning
Some disasters won't let you stay put. When you have to leave, thinking it through ahead of time keeps you from making risky snap decisions:
- Know your evacuation zone. Ask your local emergency management agency which zone you're in and what kind of event would trigger an order to go.
- Map more than one route. Never bank on a single road out. Work out at least two ways to reach your destination and drive them so they're familiar.
- Keep the car ready. During disaster season, never let the tank drop below half, and keep your emergency kit and documents within easy reach.
- Plan for your pets. Scout pet-friendly hotels and shelters along the way, and have carriers, leashes, and vaccination records on hand.
- Don't drag your feet. Treat a voluntary evacuation as if it were mandatory; roads clog and turn impassable fast as conditions sour and traffic builds.
There's no better moment to get ready than right now, with the skies clear and the shelves full. An hour of preparation today can spare you days of hardship once a crisis arrives.
Post-Disaster Recovery Steps
Should disaster actually hit, working through recovery in a deliberate order protects both your safety and your finances:
- Put safety above all. Stay away from home until officials give the all-clear, and watch for downed lines, gas leaks, and weakened structures.
- Record it all. Photograph and film every bit of damage before you move or clean a thing, because that record is the backbone of your insurance claim.
- Call your insurer right away. File the claim as fast as you can, and ask about advance funds for temporary housing if the home can't be lived in.
- Stop the damage from spreading. Make stopgap fixes like tarping a torn roof or boarding shattered windows, and hang onto every materials receipt since insurance reimburses them.
- Apply for FEMA help. Go to DisasterAssistance.gov or dial 1-800-621-3362. FEMA hands out grants for temporary housing, repairs, and other disaster costs your insurance won't cover.
- Watch out for contractors. Disaster zones draw con artists, so never pay in full up front, confirm licensing and insurance every time, and insist on a written contract before any work starts.